Yesterday I finished the cane chair! I found it last weekend at a consignment store for $35 (not bad considering the caning was in perfect condition!)
This chair is probably one of the easiest chairs to reupholster (which was good because this was the first one that weve done!)
We unscrewed the seat and popped it out, tore off the cording with pliers (needle nose would have been better, but work with what you have, right?)

Tore off the back fabric ... and then removed all of the staples with pliers (probably the most time consuming part, but still not too bad!)

We decided to replace the foam because it was dusty and pretty gross - we picked up this 3" thick piece at home depot for $20 when we upholstered the desk chairs

Using the old foam as a template, we used a very sharp kitchen to cut out the new seat

We repeated the step above for the back cushion, but we also cut the foam in half so it was about 1.5" thick

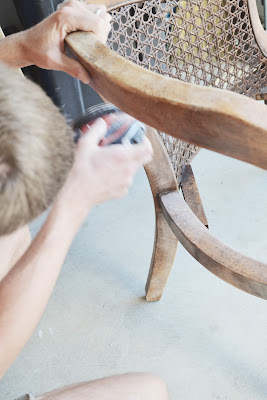
David used the sander on the straight parts and I used a sanding block on the curves and caning.
After wiping down and priming, I mixed a bright chartreuse from left over paint - BM Citron, SW Decisive Yellow, and Annie Sloan Versailles
As always, I added a little XIM Extender to reduce brush strokes ...
.JPG)
I brushed while David airbrushed the caning. I tried to brush the caning, but it was taking forever, so I am glad that we have an airbrush too!

After the paint dried, I applied a coat of clear Briwax to seal and protect the finish, which also gave it a slight sheen.
And now onto the upholstering fun :) It was really pretty easy, just pulling tight and stapling.
After debating back and forth about the white, I decided to go for it because 1. it wont be used everyday 2. if it stains quickly, I can easily (like in a few hours) reupholster again
We chose Waverlys Full Circle Sail for the fabric and sprayed it with Scotch Guard
We cut the batting and fabric allowing a few inches to overhang (we could of cut it a little smaller, but better too long than too short, right?)

While David pulled tight, I stapled ... We do a few staples and repeat on the other side, and then on all four sides to make sure it is even pulled, and then finish at the corners.

For the corners, we pull it generally how we want it, pull the part that will be under the fold and staple, then mark off the extra fabric with a pencil (pretty easy to see what is extra once we started on the corner, basically anything that got in the way :) and being careful not to cut too much! and then folded corner, until we got the fold just right, this can be tricky! and then stapled in place underneath.

and a few process shots of the back, we reassembled exactly as we took it apart. Stretched the fabric across the back, layered the foam, batting, and fabric, stapled and cut off the excess fabric.


and that was it!

I purchased the feather pillow insert from Ikea for about $7 and made the envelope pillow cover with Annie Sloan Links Indigo.


I was considering doing a contrasting fabric on the back, but I am loving the simplicity of the white.

It fits perfectly next to

Our little watch dog - they lift her up perfectly to see out the window! Better than the chair, right?


and one last detail shot of the fabric!
I couldnt be happier with our first time re-upholstering, it was super easy! So if you see one of these chairs, grab it!
Ive been hearing a lot about caning chairs, anyone else finish one recently?

0 comments:
Post a Comment