Tuesday, January 28, 2014

Monitoring the Finish


I’m lucky enough to have two (2) big (23” inch, I think) monitors at work. Since I got them, I’ve been looking to mount them to the wall and win back the desk space (I’ll never understand why flat panel monitors or TVs are left on their bases). By getting them off the desk I can slide the laptop dock under the primary monitor. That will let me set up my secondary printer where the laptop dock used to sit. The second monitor can now be hung above the phone, getting it closer to the first for a more seamless view between them.

My desk before the monitor wall mounting began.

I began by measuring the clearance I’d need for the laptop and determining where and at what height I’d like the monitors. Then of course I took their bases off and set them aside.

Laying out the mounting holes in the board.

As the wall is a steel framed, ½” gypsum wall typical of modern light commercial construction I was not comfortable mounting the monitor arms directly to the gypsum. Since I’m locating them relative to my chair and not the wall framing, I chose to mount a wooden board to the wall first. The board can be fastened to two (2) studs and the monitor arms can be mounted to the board, independent of the stud locations. Before I installed the board, I carefully layed out and pre-drilled all of the fastener holes.

We have board mounting!

Once the board was attached to the wall studs, it was a simple matter of attached the monitor arms in the pre-drilled holes, attaching the monitors to the arms and plugging everything back in.

Everything mounted and plugged in, the first time.

Unfortunately, I realized at that point that I had installed the to edge of the board at the height I had wanted the top edge of the monitor (the board is centered on the monitor height). That’s what I get for working in my office at 1:00 am.

The eye level view when the monitors were originally mounted.

A few minutes later I had taken it all apart, re-mounted the board lower, and re-assembled everything. This time the height seems dead on. I’ll move my laptop dock and confirm that it fits another day when it’s not the middle of the night. I’ll make another board to install above the original and hide the fastener holes from my first, aborted installation.

The second, correct height, mounting.

Why regal you, my dear woodworking readers, with the tale of mounting of my monitors to the wall in my office? Because that board I used to mount the monitor arms that I can now barely see behind the monitors was my finishing experiment. I used The Wood Whisperer’s Simple Varnish Finish method to finish it, and the finish came out excellent. I’ll be folding the monitors out of the way to show the board off to my coworkers.
The beautiful mounting board, soon to be buried behind monitors.

If you’re nervous about finishing, you need to check Marc out. Between the Simple Varnish Finish DVD, the Finishing: It Aint’ Over Till It’s Over book and the abundant finishing advice he shares in his podcasts, he is a wealth of actionable finishing advice. You owe it to yourself to check him out.

How are you finishing that project of yours?

The full photo album

Small Pine Chest 2

Ok ... I said the Small Pine Chest was done ...  Impatience!!!
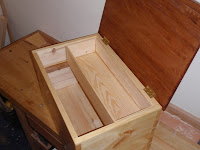
In between working on a new project, I have gone back and fitted the hinges, improved the finish and made an addition to it, hopefully making it more of a finished piece and a lot more useful.

As this project was my warm up to dovetails and making my own tool chest, I decided to add a drawer or till to it. Nothing fancy just a simple butt jointed box that sits on two Oak side rails. As it stands this would make a nice little travelling tool chest. My no#6 plane fits in the bottom like a hand in a glove! In fact its probably a good thing that my large tennon saw doesnt fit as I have now out grown my small toolbox I made (what seems like) ages ago.

Instead its going to make someone a lovely Christmas present...

Anyway, a few pics to really wrap this project up! 


Monday, January 27, 2014

How To Design Furniture

In 2009 Taunton released a special issue of Fine Woodworking: How to Design Furniture.

image from Taunton.

As with most of their special issues, its a collection of previous articles, all focusing on a single topic.

In this case, I think they cove the topic of furniture design wonderfully. There are articles about styles, creativity, proportion, drafting and even SketchUp.

This has always been one of my favorite design books. If you havent had a chance to read it, now is the time. Taunton has re-released it as a magazine special issue.  Id recommend you pick up a copy of the re-release. Its sure to prove a reference youll use long after the current print run is gone.

Updates

Ok, I have found that I need to keep a portion of my old webpage just for photos and Clash of the Titans stuff. I have put links to that stuff and upgraded the site. BUT: I need to work on the photos page - seems that Fireworks has scrambled the sequence of photos, but enjoy them anyway!
I decided to develope this blog site because it seems so much easier to edit than doing a full website, and alot quicker too.
Also, visitors can post their comments to my posts! I think that will help, especially when we need updates on Dad, family stuff, etc. - so we can all have fun with this!!!
MOM-- if you are reading this, try and post a comment and see what happens...

Later

Sunday, January 26, 2014

Finished Sack Back Windsor

This is the Sack Back Windsor chair I made during my week long class at the Windsor Institute in late July. You can read about my experience in a previous blog posting. I chose the traditional milk paint finish and the color is a deep Windsor Green. Once the paint was dry, I finished it with danish oil to give it a nice sheen.


chair sanded and ready for the milk paint
Another view

interior design dining rooms

one of our favorite projects is creating a custom dining room ... we have a project coming up where well be doing an expanding dining table with a hard curly maple inlay, 8 chairs, and a cherry and curly maple sideboard. we get to make the pieces relate, in essence, determine the style of the room ... the designs for this new project are loosely based on the furniture in my own dining room above, with of course, the clients unique input which is based on their own experience with a table i made for the clients brother in 1990 or so ... round and round it goes. click the photos to enlarge them ...
this is part of the proposal for that project ..
meanwhile, for a potential client who is coming to visit this week to discuss furniture for her dining room, i rounded up photos of different projects of different styles, most of which consisted of at least a table, some chairs and a sideboard ...
while in the natural cherry photo above this one, we were going for a more contemporary look, here were shooting for the traditional, with the dark, carved mahogany legs and stained mahogany and walnut chairs with burl backsplats ...
here, weve clearly taken a contemporary slant on the traditional, dark, arts and crafts style, taking our cues from the designs of greene and greene and stickley, but by using natural cherry we have (hopefully) brought it up into the present.
hanging fir and burl table lantern ... inlays in the top and 0n the aprons of the table
here we have the one board bubinga dining room ... plain and simple design, the table top and face of the sideboard was made from one 46" wide, 19 board of bubinga ...
here, the view from the other end ...
another take on what we refer to on our website as our studio style, a mix of natural or stained woods with painted details and accents. (love the milton avery boxers over the mantle) we used to make quite a few windsors, but, not so many any more ... im encouraging the padded seats ...
the sideboard for that table ..
and another ... for more, check out the dining table, seating, and sideboard sections of our website for other styles and designs ...

A New Clients Interesting Idea

Often my new designs are a result of interactions with thoughtful, know what we want, clients. I met some folks at the Woodstock Furniture Show. It was totally the last minute and, I mean, totally the last minute. Other furnituremakers were packing up their booths as we were talking ... Anyway, it turns out they had purchased a house in Manchester ( ! ) where I had sometimes gone to parties in the early 70s ( ! ) when I was a bartender. They are remodeling it and when I went by to check it out, it brought back some interesting, hazy memories ... The origianl owners pool table was even still there ... I took the photo below throught the sliding glass door as there was no one there and roughly photoshopped in their idea for a mirror, a 4" wide frame covered in galvanized, hung on the stone ... I wasnt precisely sure how to go about it so we had the local metalshop bend up some test pieces, stuck them on the wood with 3M Spray 90 adhesive and cut them to length on the table saw with a thin carbide blade and face shield. So far, so good ... We need to discuss finish colors, if any, and get approval for the copper boat nails we placed in the edge of the mirror. Without the nails it is going to be hard to hold the outside metal edges tight to the wood with just the contact adhesive ... Great concept ! Click the photos to enlarge them ...

The fireplace

With the mirror photoshopped in ... Actually, in the picture, its too big. The stonework is 7 wide, which I didnt know when I did the picture .. I think 4 will be perfect ...

The cutoffs of the steel parts with the spray 90 on them. The folds on the outside edges wrap around where the mirror sits

We are using 1" plywood for the frame to eliminate complicatons from seasonal wood movement ..

With the copper boat nails on the edge ... I plan to try a little patina solution on the galvanized and the nails just to see what it does, after talking with the clients ....